


Hey ya'll! Today I have a new free pattern for ya'll that has only been available as a download in the past. I designed the I Wish It Would Snowflake Hat in 2016 and it is still one of my favorite designs and it was my very 1st Tunisian crochet pattern. Last night, it snowed just a little bit which made me want snow that much worse. We did get some snow in December but I would love some more before winter is completely over. Since I am wishing for snow so much right now, I think it's the perfect time to release this pattern on my blog for ya'll! I hope ya'll love it as much as I do!


This pattern is for an adult small but my nephew had to have one and doesn't mind that it's a bit big on him. He says he will grow into it one day and he loves it because it's his favorite blue.

Isn't he just the cutest little thing ever?

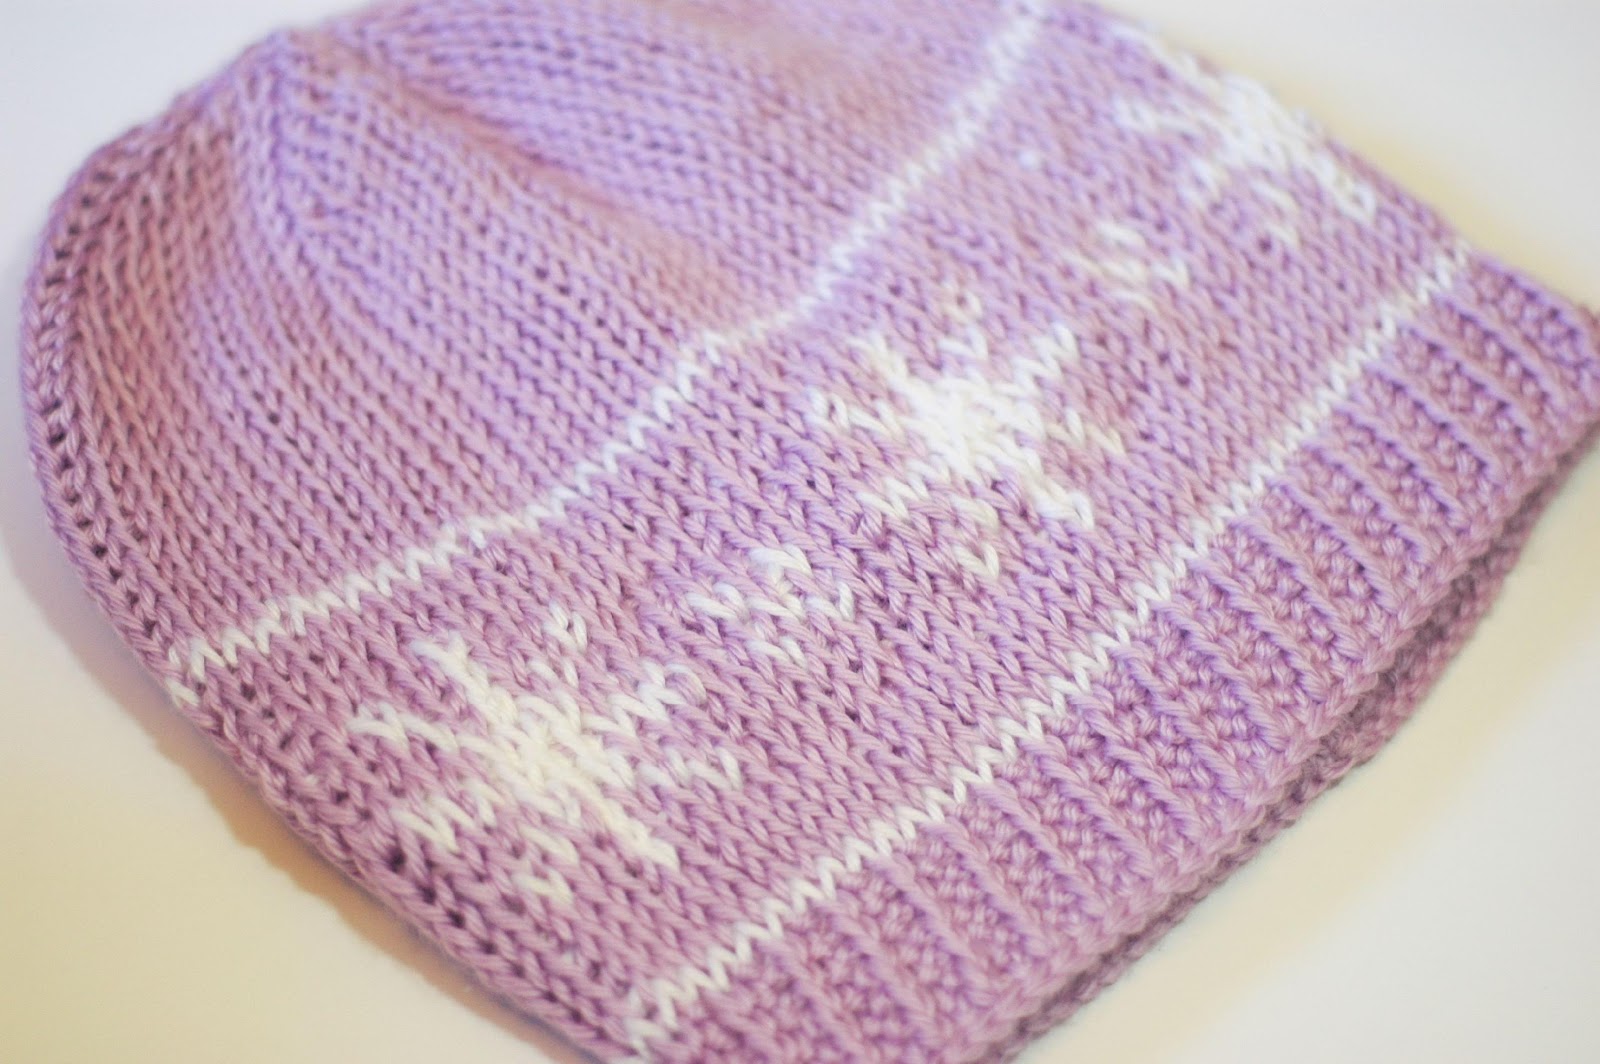
I Wish It Would Snowflake Hat
US Terminology
Intermediate Difficulty
Size
Adult Small (20-22 inches)
Gauge
8 stitches and 9 rows
Materials
- Size H (5.00mm) crochet hook or size needed for correct gauge
- Size I (5.50mm) tunisian crochet hook or size needed for correct gauge
- Medium 4 Weight Yarn (I use Caron Simply Soft)
main color: 130 grams
contrasting color: 40 grams
- Darning needle
- Scissors
- Measuring tape
Abbreviations
yo: yarn over
cc: color change
tks: tunisian knit stitch
tps: tunisian purl stitch
tksmc: tunisian knit stitch with main color
tks2tog: tunsian knit stitch decrease
Notes
I like to use a tunisian hook that is 14 inches long. One of my testers did use a 10 inch long tunisian hook but would recommend the 14 inch one. You could also use a tunisian hook with a cord.
*Each row consists of a forward and a return pass.*
*For more information on how to Tunisian crochet, see my video tutorial, click here.
forward pass: pick up loops in each chain/stitch across from right to left.
return pass: yo and pull through 1 loop. yo and pull through 2 loops until 1 loop is left on the hook.
color change: Forward pass: Insert the hook into the next stitch, yo with the new color and pull up a loop.
Return pass: When the first 2 loops on the hook are different colors, yo with the new color and pull through the 2 loops.
*For more information on how to color change and carry colors, see my video tutorial, click here.
Tunisian knit stitch: Insert hook from front to back, between the front and back vertical bars, yo, pull up a loop. Click here for the video tutorial.

Tunisian purl stitch: Bring the working yarn to the front of the work. Click here for the video tutorial.
Insert hook from right to left into the next vertical bar, yo, pull loop through.

tks2tog: Insert the hook into the next vertical bar from right to left, and then insert the hook into the next vertical bar from front to back between the front and back vertical bars, yo, pull a loop through both vertical bars. Click here for the video tutorial.

SNOWFLAKE GRIDS

THE PATTERN
Please read all of the notes before beginning this pattern.
With size H crochet hook and main color of yarn, chain 82 (fairly tight)
Switch to size I Tunisian hook: Pick up 1 loop in each back hump of each chain, starting with the second chain from the hook. =82
To find the back hump of the chain, pick up the chain with it facing you and turn it until you see the horizontal bars on the back. Those are the back humps of the chain.
When picking up loops, keep the loops on the hook loose enough for the fabric to hang below the hook.
Return pass: yo and draw through 1 loop. yo and draw through 2 loops until 1 loop is left on the hook.
This should measure 20 inches.
RIBBING
R1: 2 tks, *tps, tks. Repeat from the star across. The first stitch is on the hook and counts as a knit stitch. (The first stitch and the last stitch of the row will be hidden when the hat is seamed up.) =82
Return pass.
*Remember that the first stitch is on the hook, at the beginning of every row.*
R2-R5: Repeat R1.
R6: 2 tks, *tps, tks. Repeat from the star across. =82
Return pass and cc to contrasting color when 2 loops remain on the hook. When two loops are left on the hook, yo with contrasting color and pull through the 2 loops on the hook.
R7: With contrasting color tks across. =82
Return pass and cc to main color when 2 loops remain on the hook.
R8: With main color, tks across. =82
Return pass.
R9 and R10: Repeat R8.
THE SNOWFLAKES
*I try to carry colors when there are 3-5 stitches between colors. Also, keep the loops between colors loose so they do not stretch the stitches.*
R11: 7 tksmc, tkscc *15 tksmc, tkscc. Repeat from star 3x. 10 tksmc. =82
Return pass.
R12: 4 tksmc, tkscc, 2 tksmc, tkscc, 2 tksmc, tkscc *9 tksmc, tkscc, 2 tksmc, tkscc, 2 tksmc, tkscc. Repeat from star 3x. 7 tksmc. =82
Return pass.
R13: 5 tksmc, tkscc, tksmc, tkscc, tksmc, tkscc *11 tksmc, tkscc, tksmc, tkscc, tksmc, tkscc. Repeat from star 3x. 8 tksmc. =82
Return pass.
R14: 6 tksmc, 3 tkscc, 5 tksmc, tkscc, tksmc, tkscc *5 tksmc, 3 tkscc, 5 tksmc, tkscc, tksmc, tkscc. Repeat from star 3x. tksmc. =82
Return pass.
R15: 3 tksmc, 9 tkscc, 3 tksmc, tkscc *3 tksmc, 9 tkscc, 3 tksmc, tkscc. Repeat from the star 3x. 2 tksmc. =82
Return pass.
R16: Repeat R14.
R17: Repeat R13.
R18: Repeat R12.
R19: Repeat R11.
R20: With main color, tks across. =82
Return pass.
R21: With main color, tks across. =82
Return pass.
R22: With main color, tks acroos. =82
Return pass and cc to contrasting color when 2 loops remain on the hook.
R23: With contrasting color tks across. =82
Return pass and cc to main color when 2 loops remain on the hook.
R24: With main color, tks across. =82
Return pass.
Repeat R24 until the hat measures 8.5 inches or the desired length.
DECREASING
R1: 9 tks, tks2tog *8 tks, tks2tog. Repeat from the star across and in the last stitch tks. =74
Return pass.
R2: tks across. =74
Return pass.
R3: 8 tks, tks2tog *7 tks, tks2tog. Repeat from the star across and in the last stitch tks. =66
Return pass.
R4: tks across. =66
Return pass.
R5: 7 tks, tks2tog *6 tks, tks2tog. Repeat from the star across and in the last stitch tks. =58
Return pass.
R6: tks across. =58
Return pass.
R7: 6 tks, tks2tog *5 tks, tks2tog. Repeat from the star across and in the last stitch tks. =50
Return pass.
R8: 5 tks, tks2tog *4 tks, tks2tog. Repeat from the star across and in the last stitch tks. =42
Return pass.
R9: 4 tks, tks2tog *3 tks, tks2tog. Repeat from the star across and in the last stitch tks. =34
Return pass.
R10: 3 tks, tks2tog *2 tks, tks2tog. Repeat from the star across and in the last stitch tks. =26
Return pass.
R11: 2 tks, tks2tog *tks, tks2tog. Repeat from the star across and in the last stitch tks. =18
Return pass.
R12: tks *tks2tog. Repeat from the star across and in the last stitch tks. =10
Return pass. (The hat should now be 10.5 inches tall unless the desired length of the hat was changed.)
BINDING OFF
To bind off, in the next stitch, insert the hook from front to back between the front and back vertical bars, yo, pull loop through, then pull the loop through the loop on the hook. Repeat this across the remaining stitches. Cut the yarn leaving a tail long enough to close the hole up and pull through the last stitch. The yarn does not need to be long enough to seam the hat.

CLOSING THE HOLE AT THE TOP OF THE HAT
Using a darning needle, thread the yarn into each remaining stitch starting with the stitch farthest from the last stitch, thread the yarn through the front loop only and continue doing so all the way around. Pull the yarn tight, closing the hole and then thread through the first stitch again. Weave in the ends.

SEAMING
Cut a new piece of yarn the same color as the main color, long enough to seam the back of the hat. Use the mattress stitch to seam up the back of the hat.
Using a darning needle, thread the yarn through the bottom corner of the hat and then thread the yarn through the opposite bottom corner leaving the yarn loose. Switching back to the other side, pull the end row of stitches away to reveal a horizontal bar next to the first stitch. Thread the yarn through the horizontal bar loosely. On the opposite side, pull the end row of stitches away to reveal a horizontal bar next to the stitch and thread the yarn through it loosely. Keep repeating, back and forth, until you reach the top of the hat. Pick up both ends of the yarn and lightly pull on the ends until the seam closes up. Weave in the ends.


Optional: Add a pom pom! Click here for my pom pom video tutorial.
The End!
Copyright ©2016 Alexandra Halsey Feel free to sell any finished items, but I do request that you put a link back to my pattern and credit Alexandra Halsey for the original design under the Creative Commons AttributionShare Alike license. Do not copy, share, download or publicly display this pattern without permission, and no video tutorials may be made using this pattern.
I hope ya'll love this pattern! If you make any I Wish It Would Snowflake Hats, please tag me on social media, thank you so much!
I hope ya'll are having a wonderful day!
