


Last spring I wanted to make a lightweight hat that I could wear during the spring and summer, but I think the hat I came up with is great for all seasons!
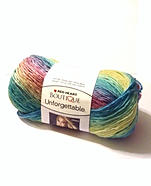
I love slouchy berets and I love Red Heart's Boutique Unforgettable Yarn so I used it to make this hat. It's a very comfotable and soft hat that I love and I want to share the free pattern with ya'll.


The Any Season Slouchy Hat
Size
Adult small (fits a 22 inch head)
Materials
H hook (5.0 mm )
Scissors
Darning needle
Measuring Tape
Abbreviations, Definitions, and Tips
This pattern is worked in the round.
How to start: I start by making a loose slip knot, chain 3 and then work the first round of double crochets into the slip knot. Pull the tail end to close the hole tight. (You do not have to start with this method. You can use a magic ring or any other method that you choose.)
How to start each round: Chain 2 and put the first stitch into the same stitch as the chain 2. The chain 2 does not count as a double crochet.
How to end each round: After you make the last stitch of the round, slip stitch to the first stitch of the round..
Ch: chain
sc: single crochet
dc: double crochet
2dc: double crochet increase (Put 2 double crochets into the same stitch.)
dc2tog: double crochet decrease (Yarn over the hook and insert the hook into the stitch, yarn over and pull the hook through the stitch. Yarn over and pull the hook through the first 2 loops on the hook. Yarn over and insert the hook into the next stitch. Yarn over and pull the hook through the stitch. Yarn over and pull the hook through the first 2 loops on the hook. Yarn over and pull the hook through all 3 loops on the hook.)
hdc: half double crochet
hdc or sc in the 3rd loop: Video tutorial: https://www.youtube.com/watch?v=j-gFiKM5b4w
The Pattern
R1: Make a loose slip knot and chain 3 (does not count as a dc). Put 12 dc into the loose slip knot and slip stitch to the first dc. Pull the tail end to close the hole. =12
(the diameter of the circle should be approximately 1 inch)
R2: Ch 2 (does not count as a dc), 2dc into the same stitch and in each stitch. =24
(the diameter of the circle should be approximately 2.5 inches)
R3: Ch 2, 2dc in the same stitch, dc in the next stitch. Repeat all the way around. =36
(the diameter of the circle should be approximately 3.25 inches)
R4: Ch 2, 2dc in the same stitch, dc in the next 2 stitches. Repeat all the way around. =48
(the diameter of the circle should be approximately 4.25 inches)
R5: Ch 2, 2dc in the same stitch, dc in the next 3 stitches. Repeat all the way around. =60
(the diameter of the circle should be approximately 5.25 inches)
R6: Ch 2, 2dc in the same stitch, dc in the next 4 stitches. Repeat all the way around. =72
(the diameter of the circle should be approximately 6.25 inches)
R7: Ch 2, 2dc in the same stitch, dc in the next 5 stitches. Repeat all the way around. =84
(the diameter of the circle should be approximately 7 inches)
R8: Ch 2, 2dc in the same stitch, dc in the next 6 stitches. Repeat all the way around. =96
(the diameter of the circle should be approximately 8.25 inches)
R9: Ch 2, 2dc in the same stitch, dc in the next 7 stitches. Repeat all the way around. =108
(the diameter of the circle should be approximately 9.25 inches)
R10: Ch 2, 2dc in the same stitch, dc in the next 8 stitches. Repeat all the way around. =120
(the diameter of the circle should be approximately 10.25 inches)
R11-R13: Ch 2, dc in the same stitch and in each stitch. =120
R14: Ch 2, dc2tog, dc in the next 8 stitches. Repeat all the way around. =108
R15: Ch 2, dc2tog, dc in the next 7 stitches. Repeat all the way around. =96
R16: Ch 2, dc2tog, dc in the next 6 stitches. Repeat all the way around. =84
R17: Ch 2, dc2tog, dc in the next 5 stitches. Repeat all the way around. =72
R18: Ch 2, dc2tog, dc in the next 4 stitches. Repeat all the way around. =60
R19: Ch 2, dc2tog, dc in the next 3 stitches. Repeat all the way around. =48
Border Option A:


R20: Ch 1, sc in the same and in each stitch. (single crochet loosely so that the hat does not become too tight.) =48
Cut the yarn and weave in the ends.
Border Option B:


R20-21: Ch 2, hdc in the 3rd loop (see abbreviations, definitions, and tips section) of the same stitch and in each stitch. =48
R22: Ch 1, sc in the 3rd loop of the same stitch and in each stitch. (single crochet loosely so that the hat does not become too tight.) =48
Cut the yarn and weave in the ends.
The End!
The End!
Copyright ©2014 Alexandra Halsey
You may sell any finished items, but I do request that you put a link back to my pattern and credit Alexandra Halsey for the original design under the Creative Commons Attribution Share Alike license. Do not copy, share, download or publicly display this pattern without permission.

I hope ya'll like this pattern! If you have any questions, let me know and I would love to see finished hats on my facebook page or you can tag me on instagram @_with_alex
Soft hugs and

